March 23, 2021 / Nirav Shah
In the last blog, we learn about EC2 Image Builder. Now let’s understand it’s practical demonstration.
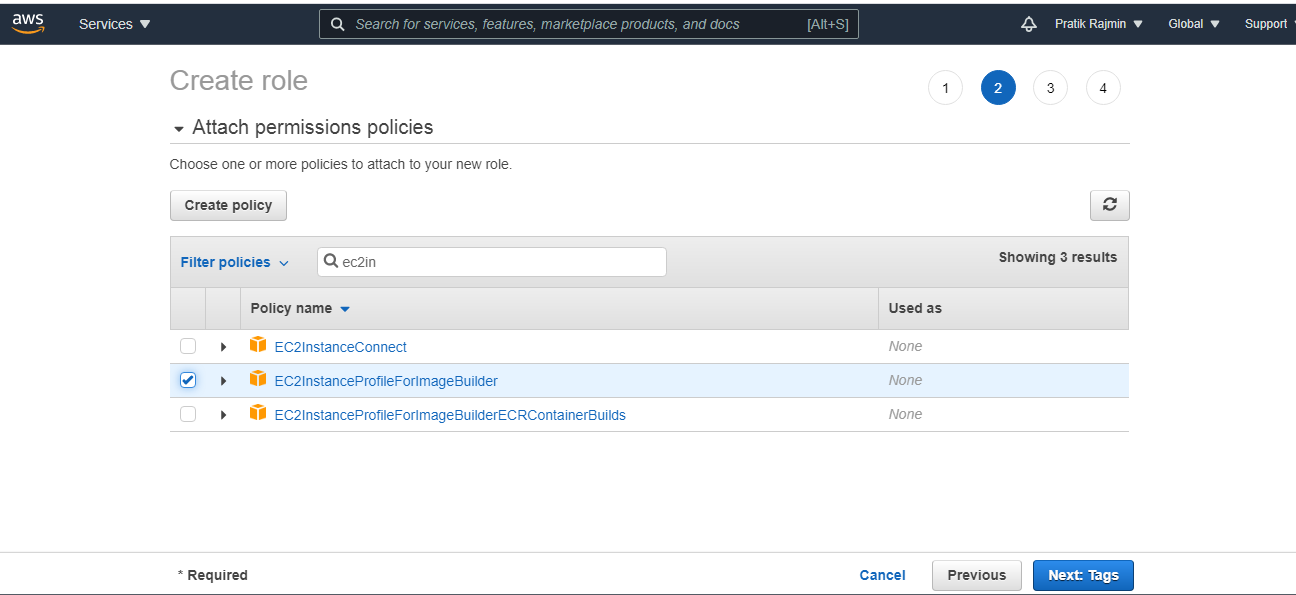
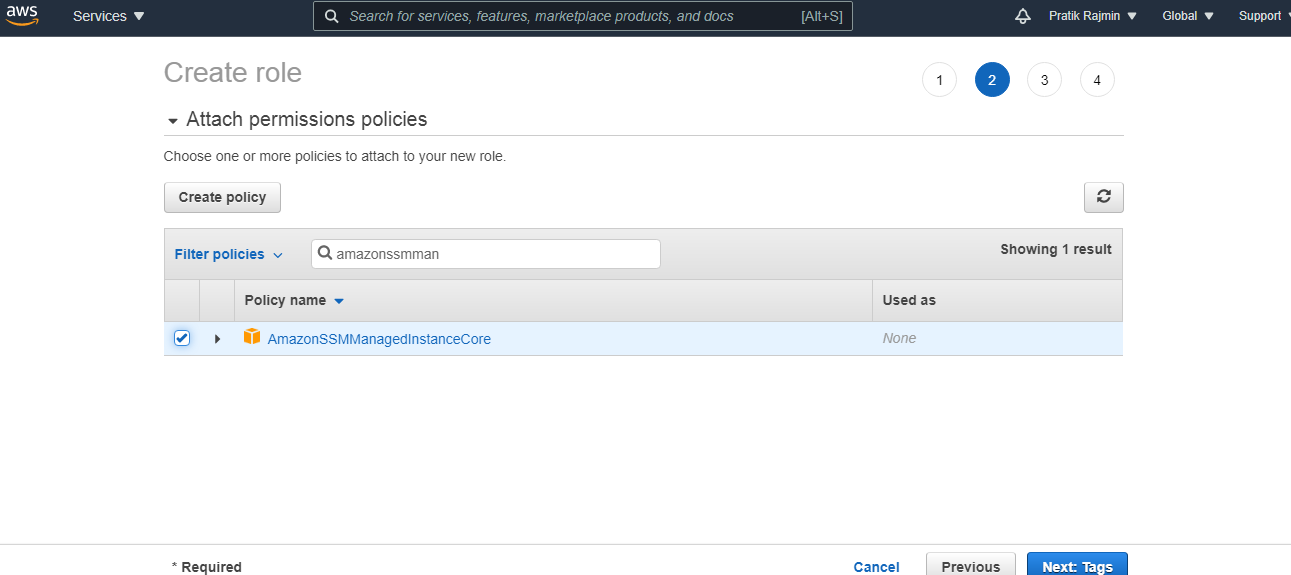
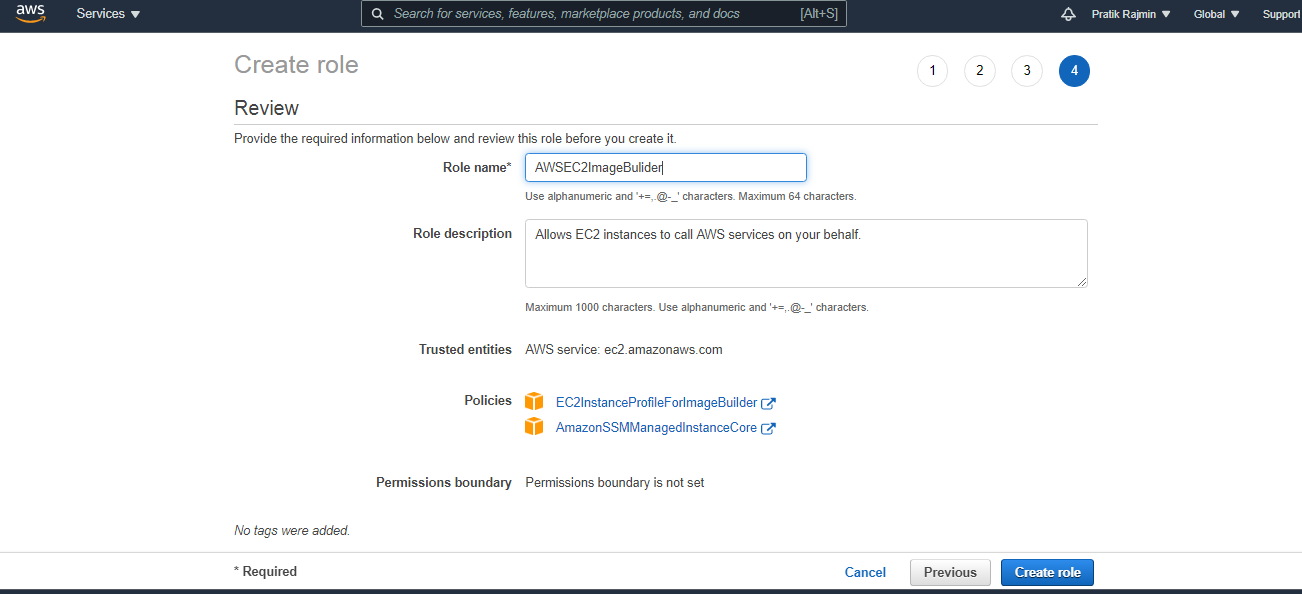
Step 1: Create an IAM Role for this using below two policies.
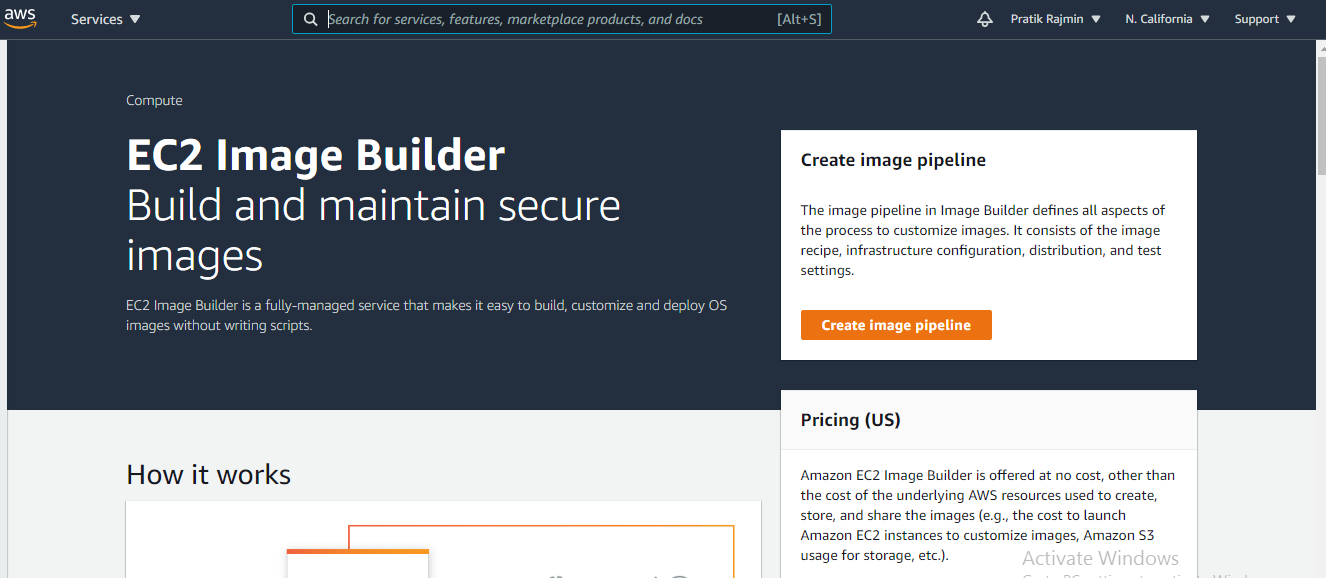
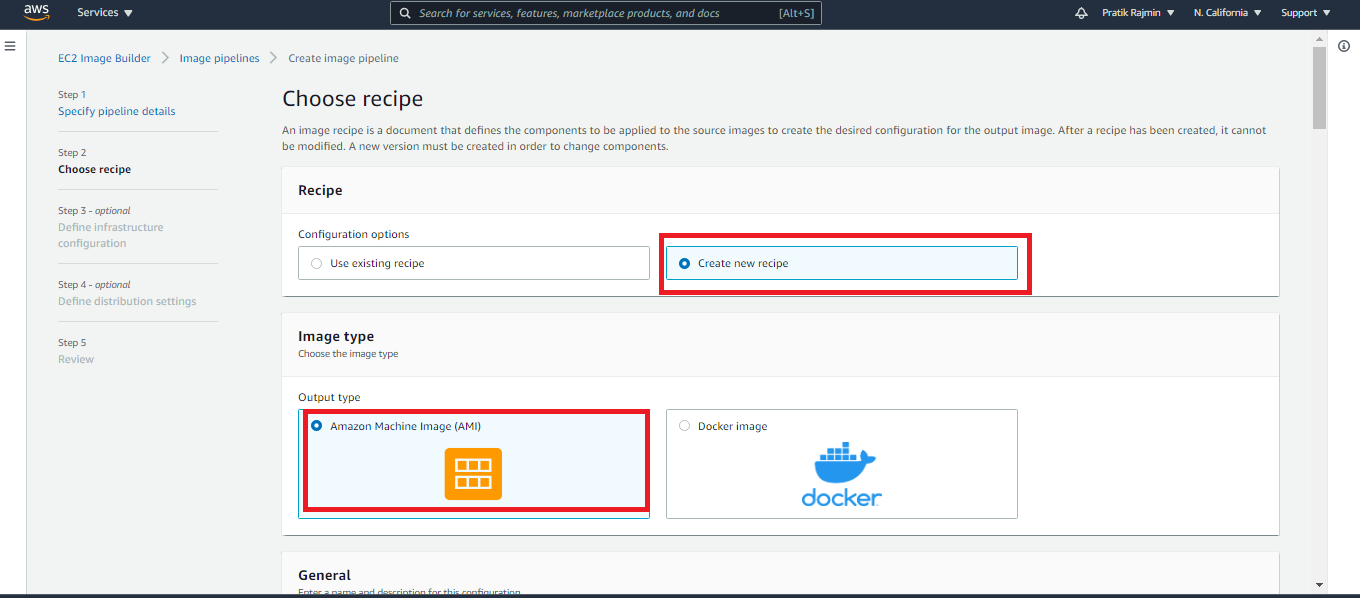
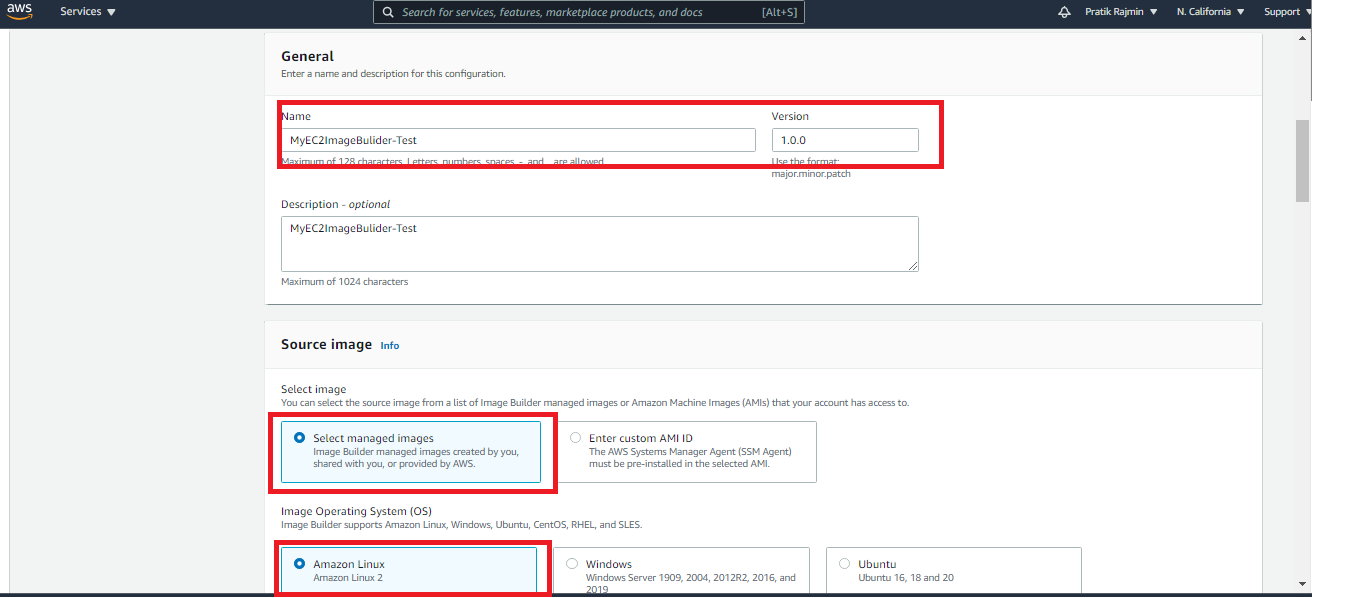
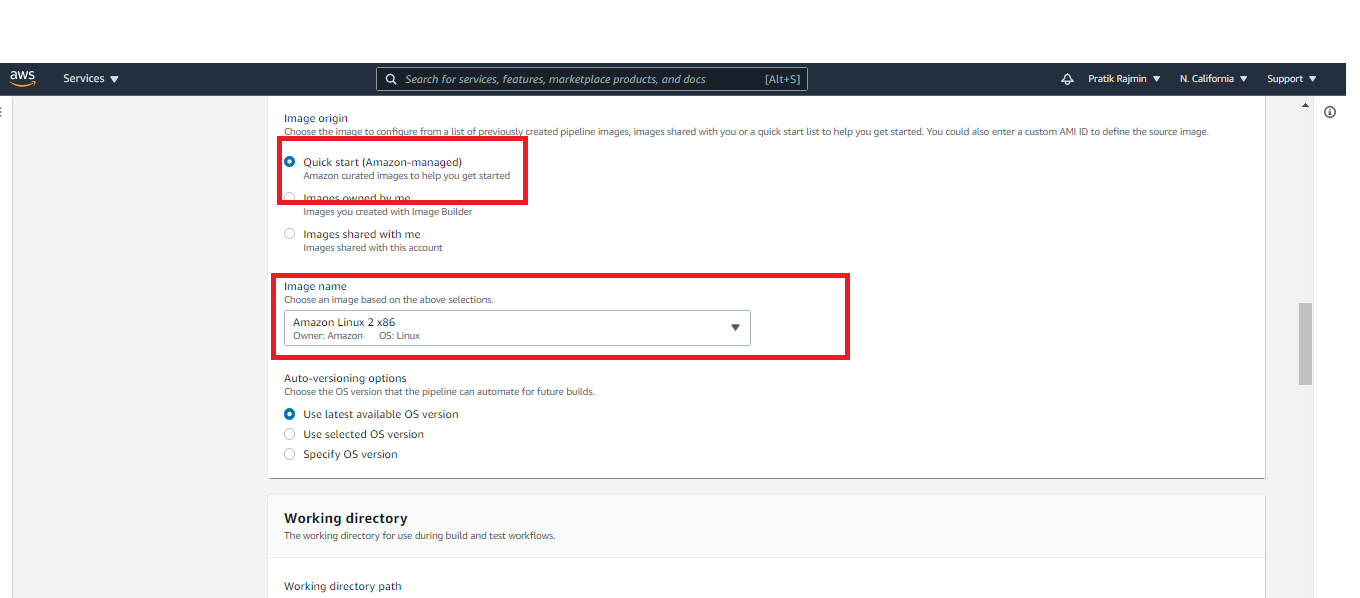
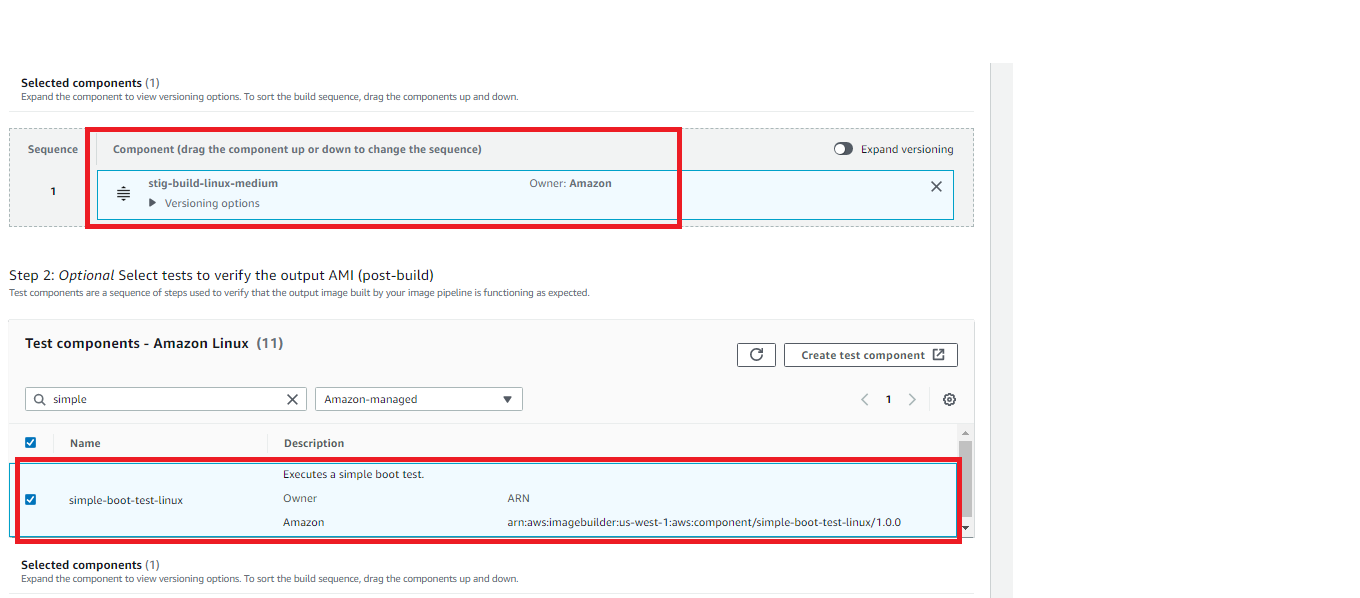
Step 2: Now open the EC2 Image Builder AWS console and in the Define Recipe page, create an image recipe, which includes your source image and components.
Step 3: Provide details as per the snap-in.
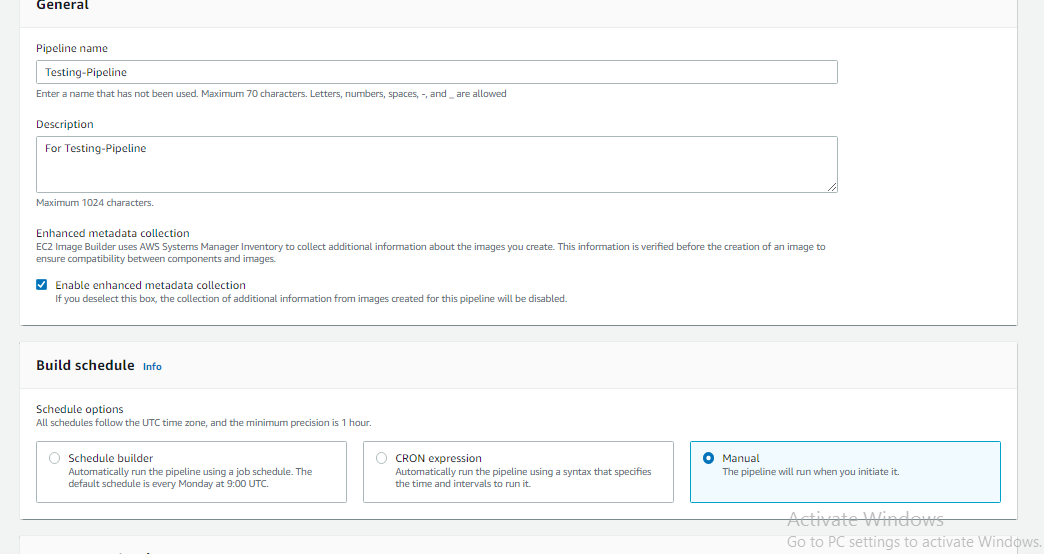
Provide the following specifications under Pipeline details
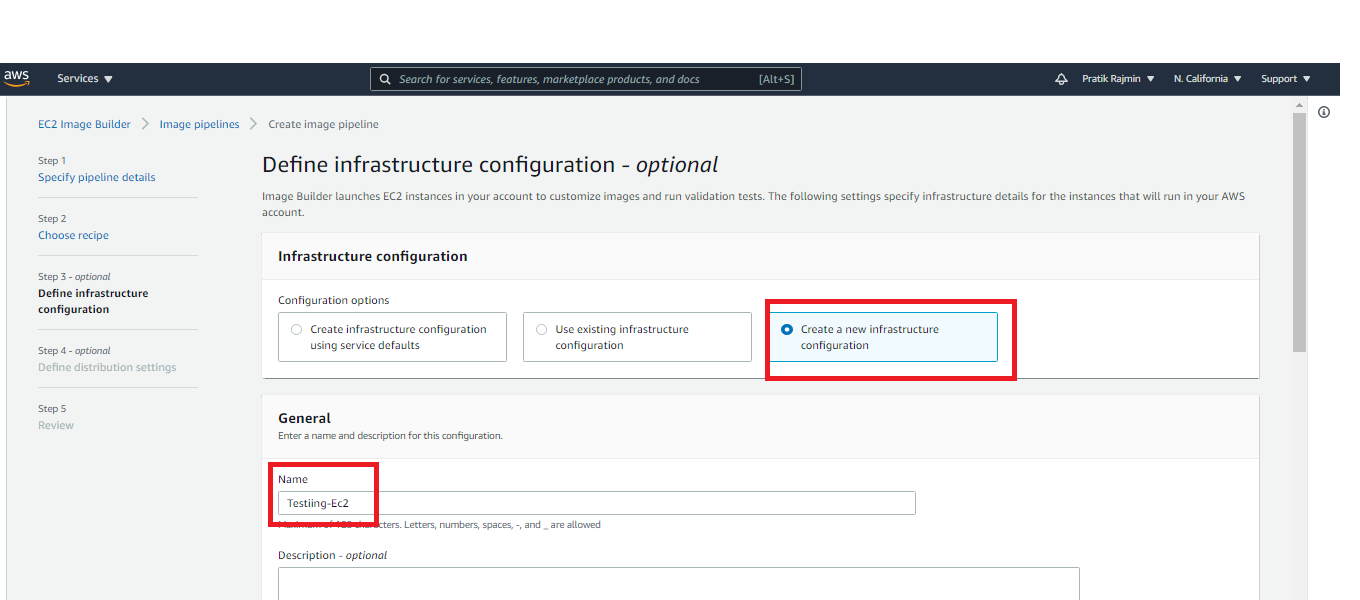
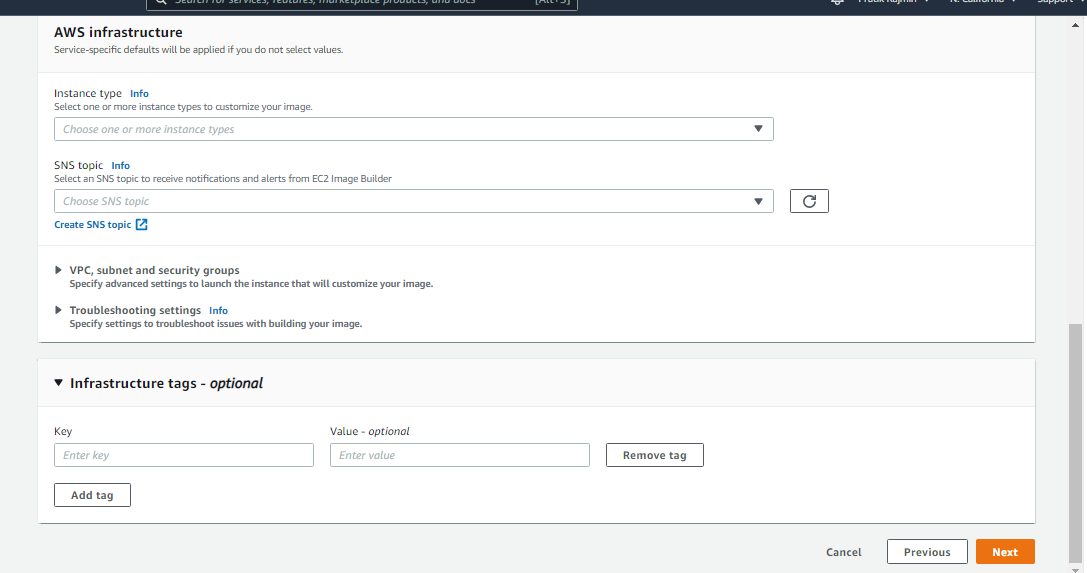
Step 4: Infrastructure configuration
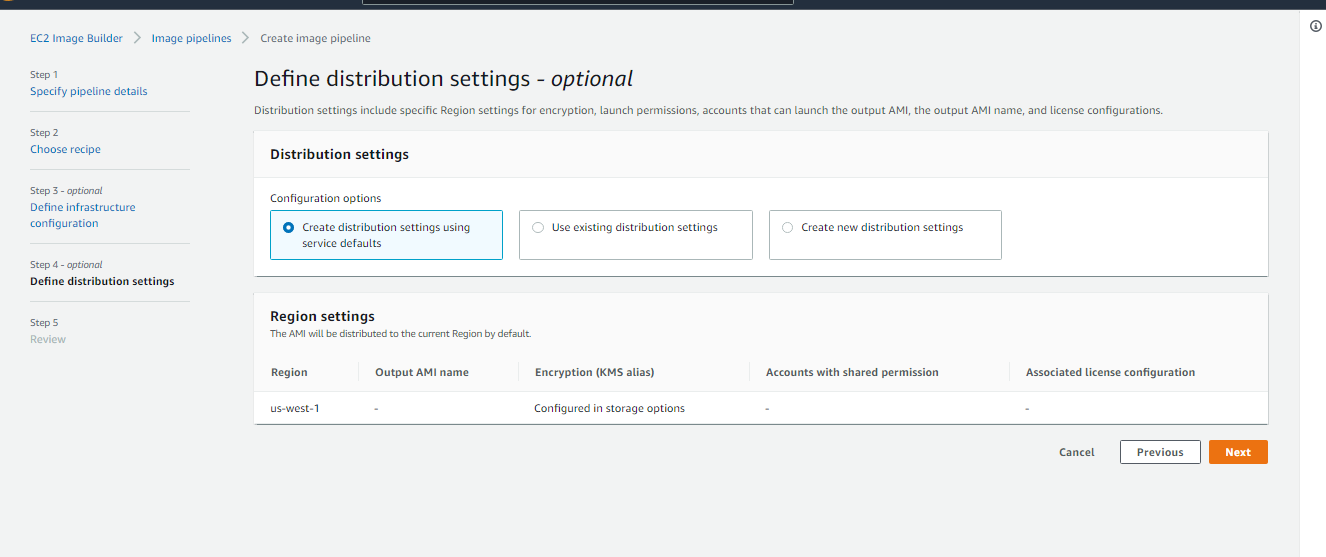
Step 5: Distribution settings
On the Review and create page, you can review all of your settings before you create your image pipeline. Review your Recipe details, your Pipeline configuration details, and your Additional settings.
Step 6: Review and create your pipeline
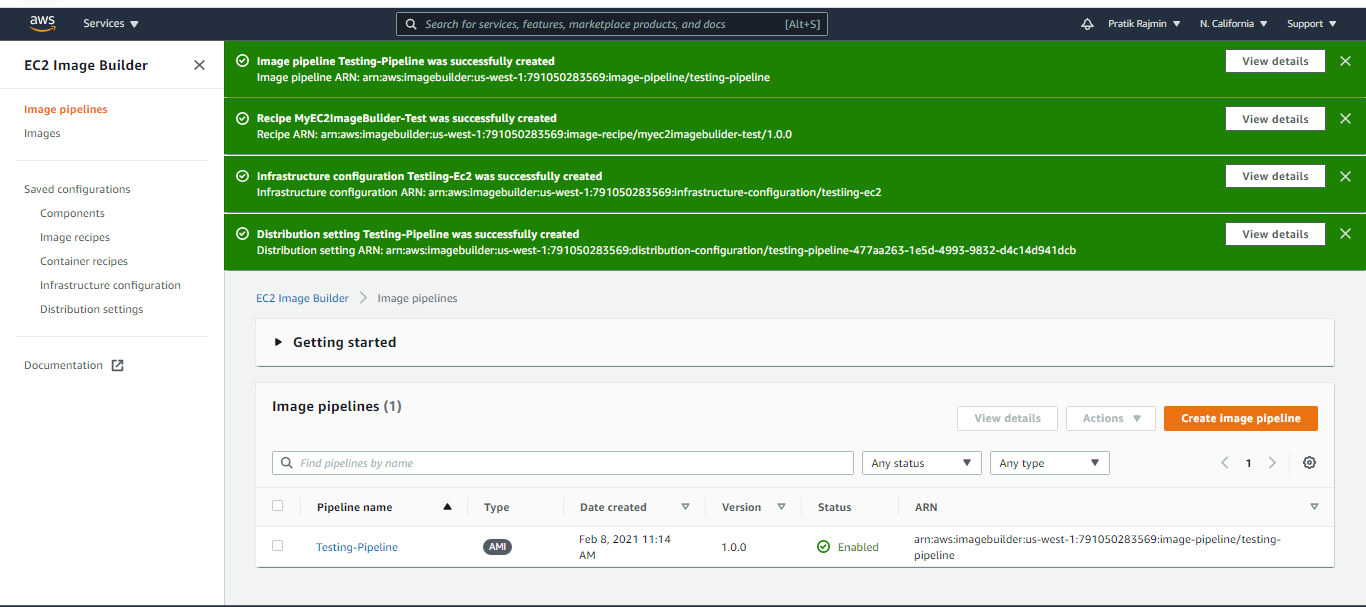
Step 7: Run your pipeline manually. When your image pipeline creation succeeds, you are taken to the Image pipelines page. From here, you can manage, delete, disable, view details about, and run your image pipeline.

Step 8: Pipeline initiated successfully. Now check it on EC2 Dashboard.
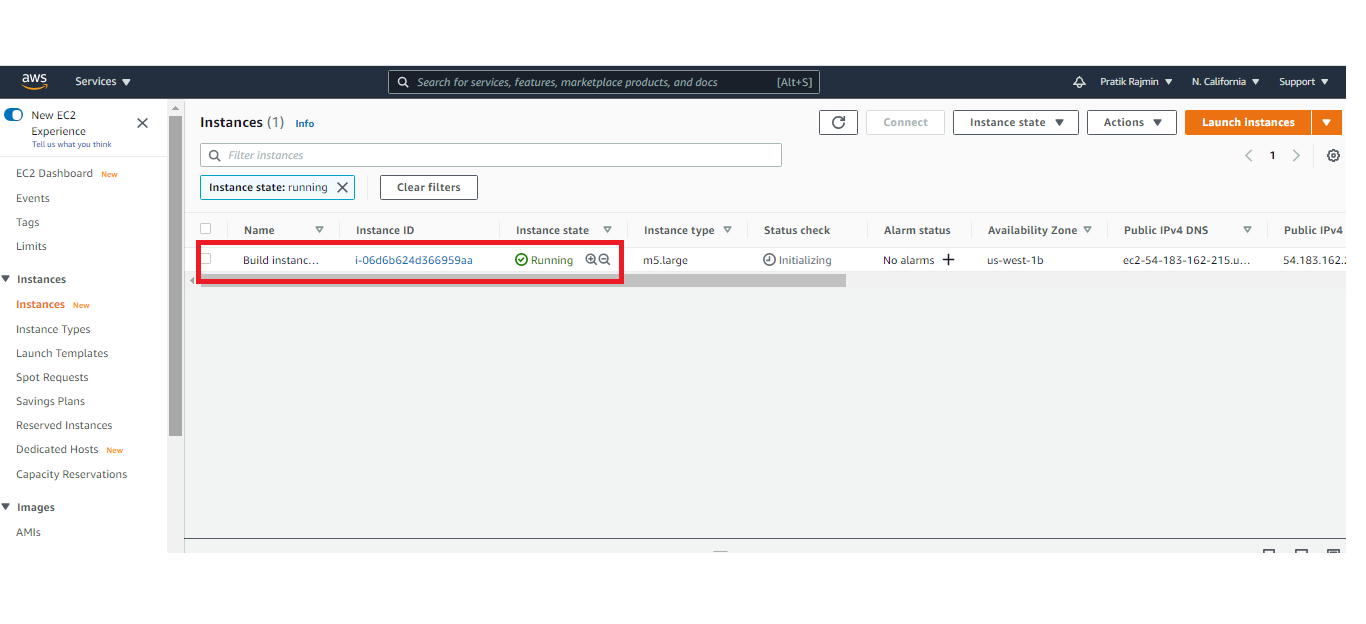
Step 9: Verify the Status.
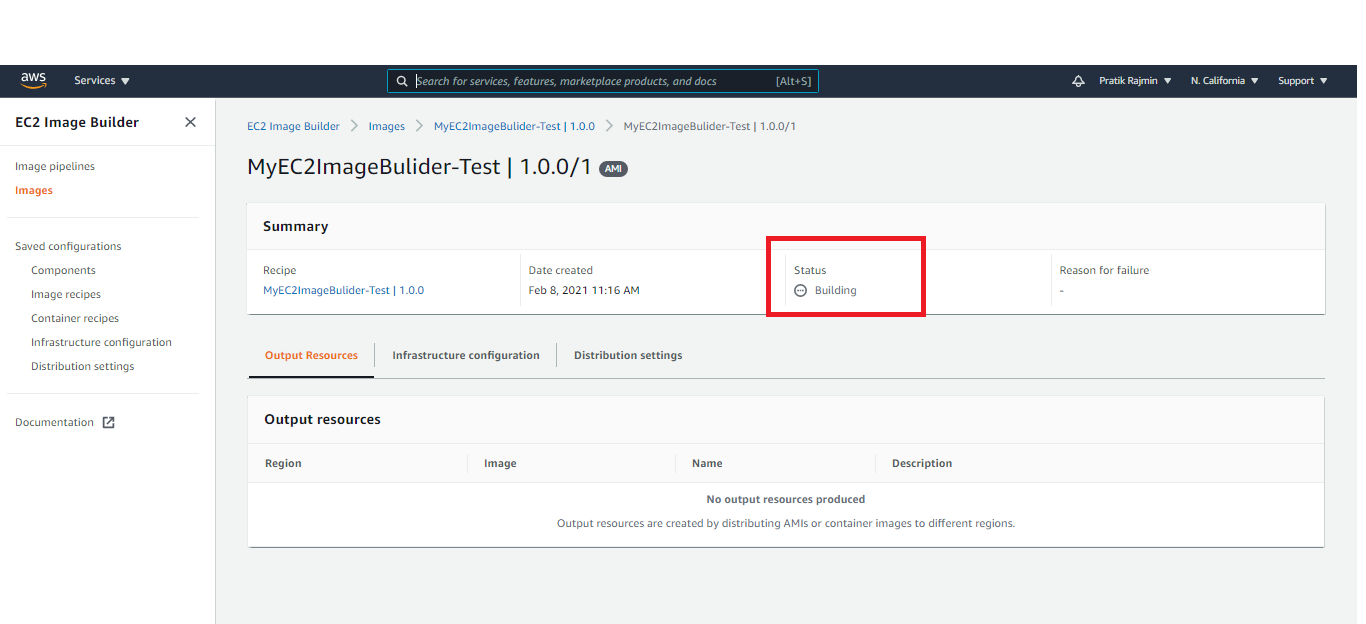
Step 10: Verify the Status.
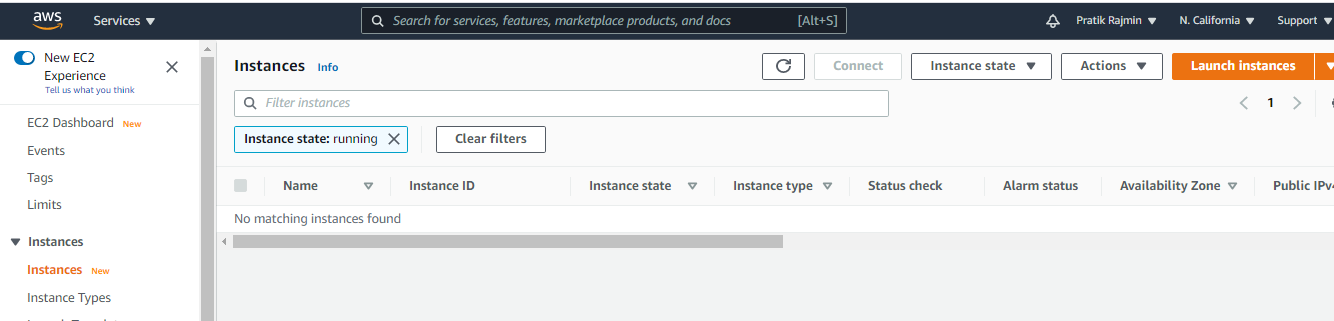
Step 11: Verify the EC2 Dashboard
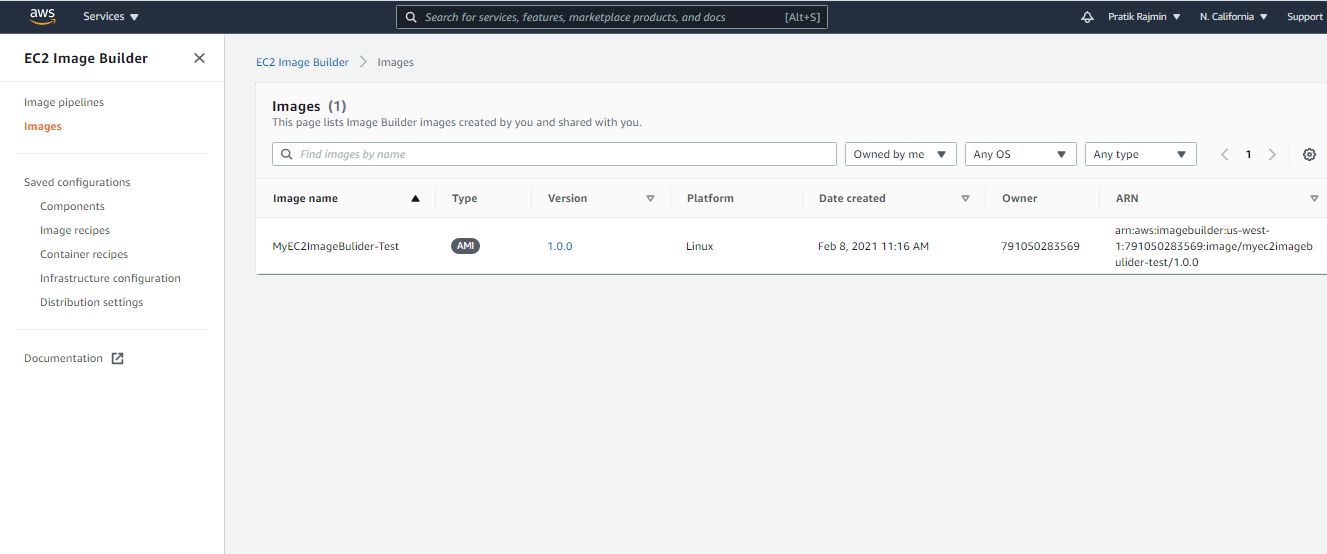
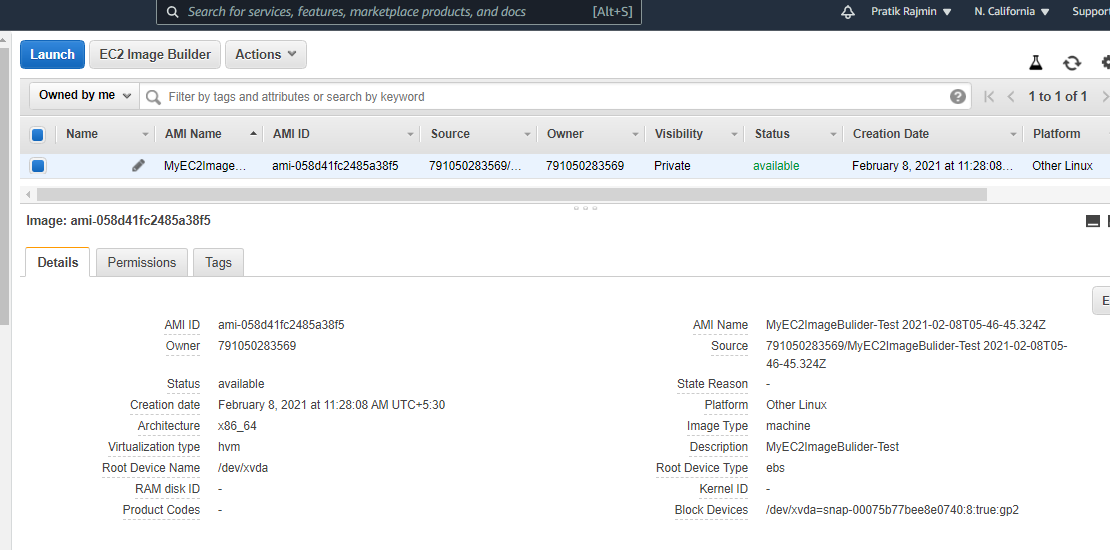
Step 12: Verify the AMI console, the AMI is there and the EC2 instance is deleted.
EC2 Image Builder tracks and displays the progress for each step in the image building process.


Nirav Shah is the Director of Eternal Web Pvt Ltd, an AWS Advanced Consulting Partner and certified Odoo Partner based in the UK. With over a decade of experience in cloud computing, digital transformation, and ERP implementation, Nirav helps enterprises adopt the right technology to solve complex business challenges. He specialises in AWS infrastructure, Odoo ERP, and web development solutions for businesses across the UK and beyond.
Have queries about your project idea or concept? Please drop in your project details to discuss with our AWS Global Cloud Infrastructure service specialists and consultants.


