How to recreate the deleted default VPC in AWS?

How to recreate the deleted default VPC in AWS?

June 23, 2020 / Nirav Shah

Amazon Virtual Private Cloud

What if by mistake you delete your default VPC don’t worry we have the solution for you please follow the steps as under.

  • We are going to restore the default vpc through 3 methods

Method 1

To create a default VPC using the Amazon VPC console

  • Open the Amazon VPC in the console
  • In the navigation pane, choose Your VPCs.
  • Choose Actions, Create Default VPC
  • Choose Create. Close the confirmation screen

Method 2

To create a default VPC using the command line

  • You can use the create-default-vpc AWS CLI command. This command does not have any input parameters.
    • aws ec2 create-default-vpc
    • recreate-deleted-default-VPC-AWS

This are the most easy way to create the Default VPC

Now let’s make the VPC manually

Method 3

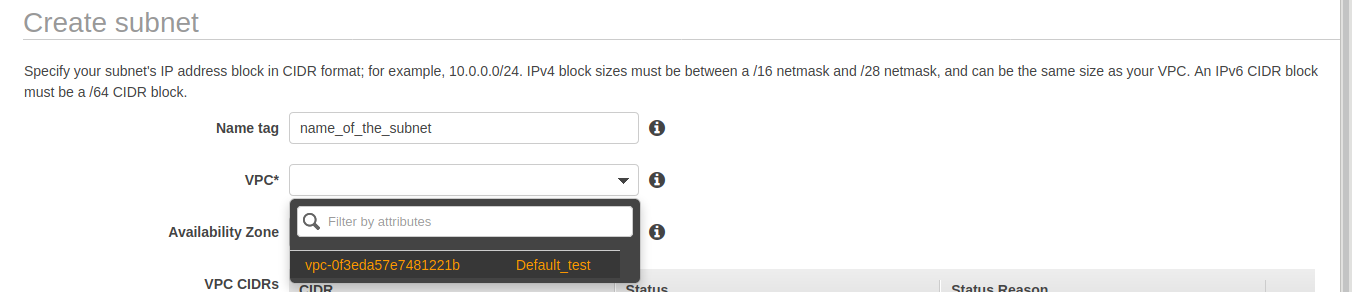
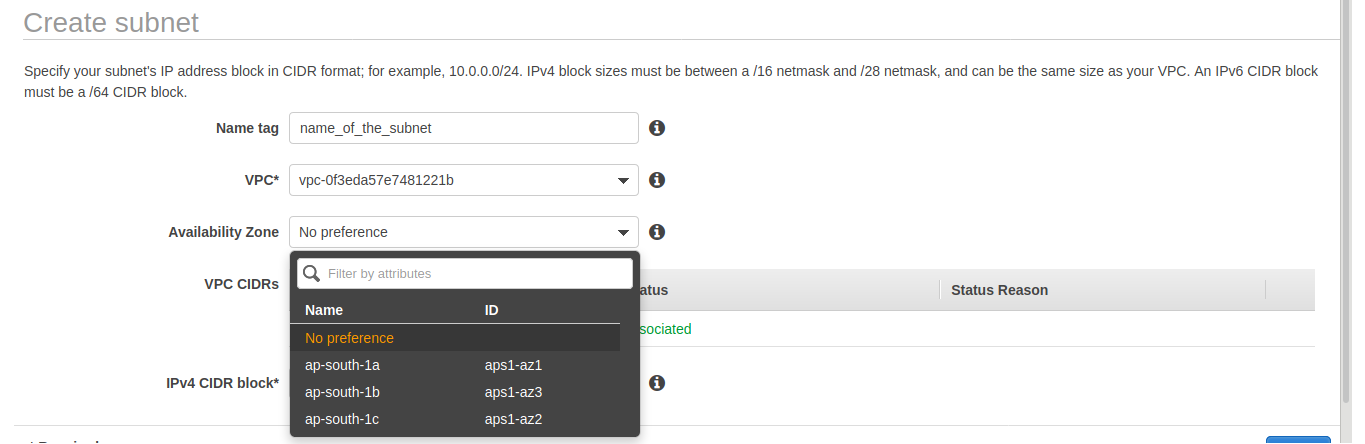
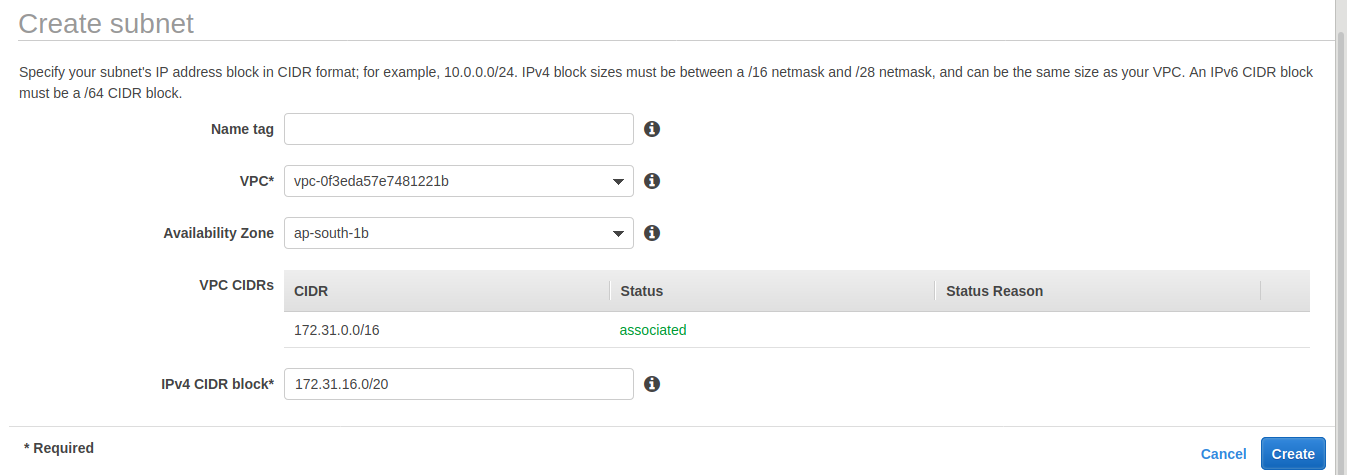
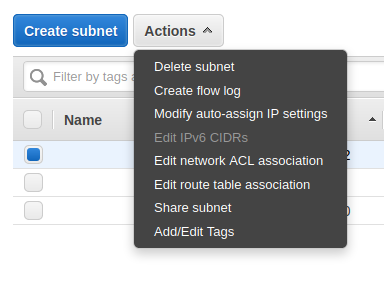
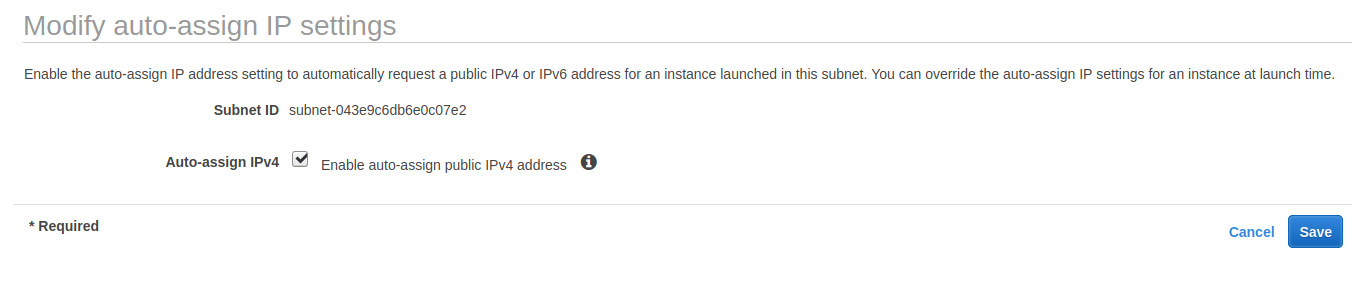
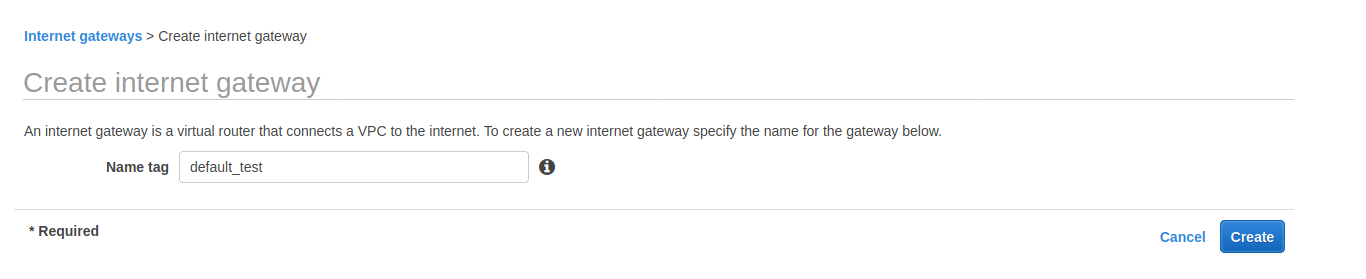
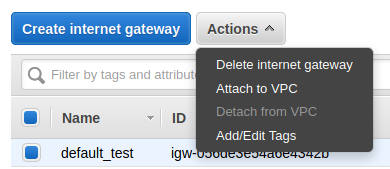
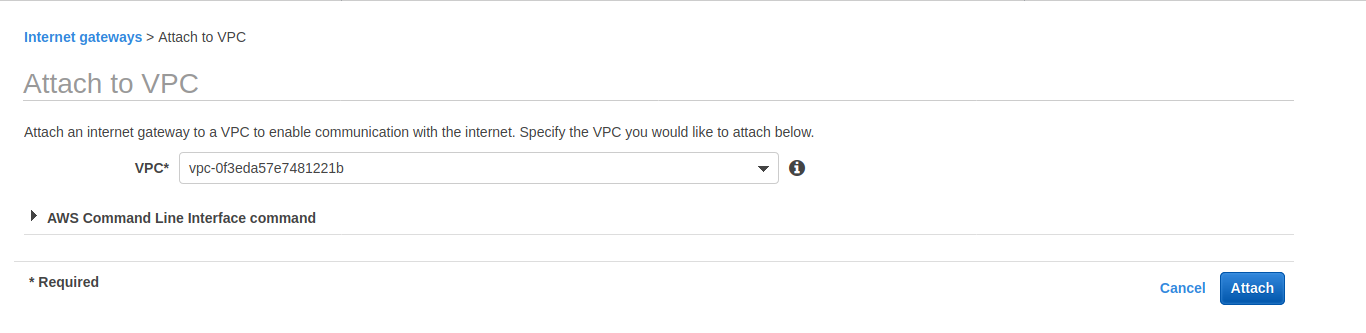
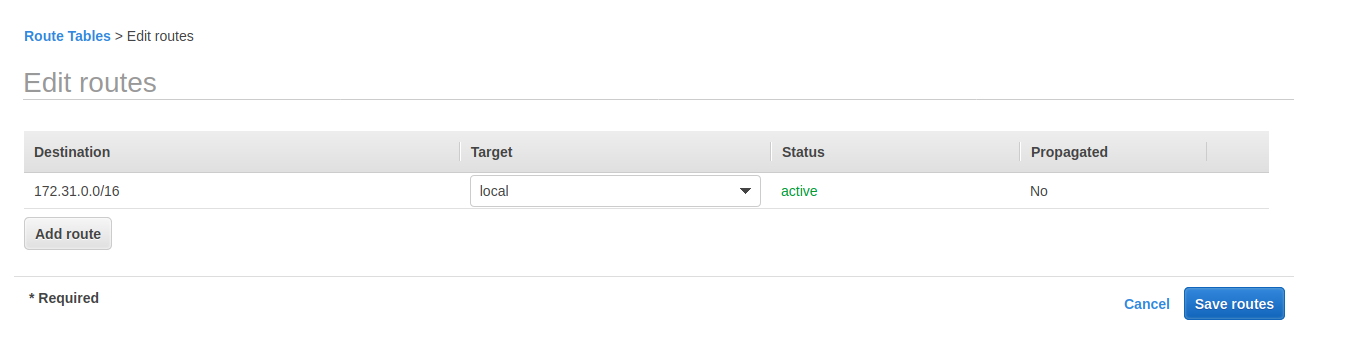
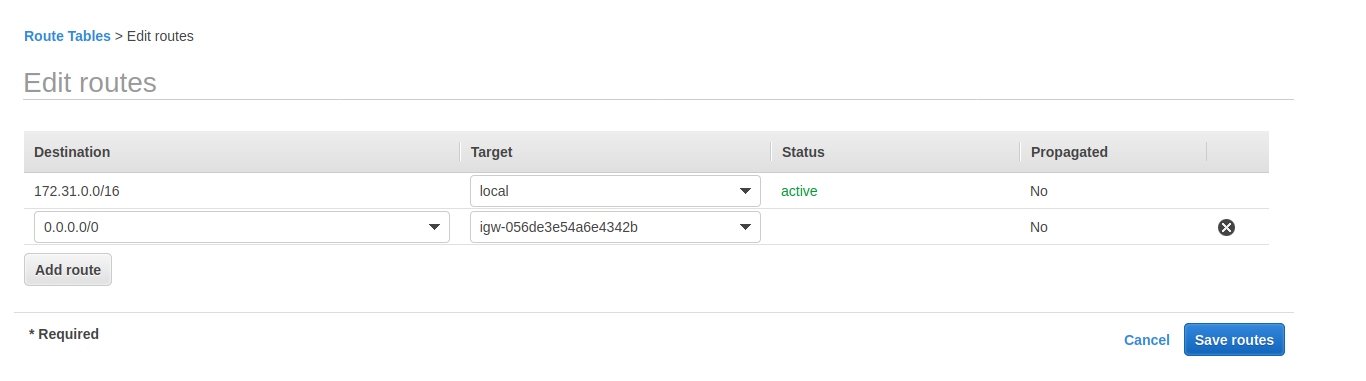
To create a default VPC manually using the Amazon VPC console

  • Login in to aws console and navigate to VPC
  • Click on Create VPC
    • Input the name and CIDR block in the console
    • We have taken 172.31.0.0/16 CIDR
    • Select the tenancy as Default
    • recreate-deleted-default-VPC-AWS
    • As you can see we have successfully created our vpc
    • recreate-deleted-default-VPC-AWS
  • Select subnet located on the left side of the screen
  • Click on create subnet
  • recreate-deleted-default-VPC-AWS
  • Input your desired name or leave it blank it’s up to you
  • recreate-deleted-default-VPC-AWS
  • Select the newly created VPC ( default_test )
  • recreate-deleted-default-VPC-AWS
  • Select the availability zone where you want to create the subnet
  • recreate-deleted-default-VPC-AWS
  • Input the IPV4 CIDR BLOCK ( 172.31.0.0/20, 172.31.16.0/20, 172.31.32.0/20 )
  • recreate-deleted-default-VPC-AWS
  • recreate-deleted-default-VPC-AWS
    • Please create 3 different subnets or number of subnets you want to be available for your vpc
  • Select the newly created subnet and click on Action on the top of the screen.
  • Click on Modify auto-assign IP settings
  • recreate-deleted-default-VPC-AWS
  • Make check on the Enable auto-assign public IPv4 address
  • recreate-deleted-default-VPC-AWS
  • Select Internet Gateway located on left side of the screen
  • Click on Create Internet Gateway
  • recreate-deleted-default-VPC-AWS
  • Input your desired name i have given it the same name as my VPC
  • Click on Create
  • recreate-deleted-default-VPC-AWS
  • Select the newly created Internet gateway ( Default_test )
  • Click on Action
  • Select Attach to VPC
  • recreate-deleted-default-VPC-AWS
  • Select the newly created VPC ( Default_test )
  • recreate-deleted-default-VPC-AWS
  • Navigate to Route table located on left side of the screen and select Route which at the end of the screen
  • recreate-deleted-default-VPC-AWS
  • Now click on Edit Route
  • recreate-deleted-default-VPC-AWS
  • Click on Add Route
    • Destination – 0.0.0.0/0
    • Target – the newly created internet-gateway
    • Note If you don’t find your internet gateway just copy the igw id from the internet gateway console and paste it here.
    • recreate-deleted-default-VPC-AWS

Conclusion

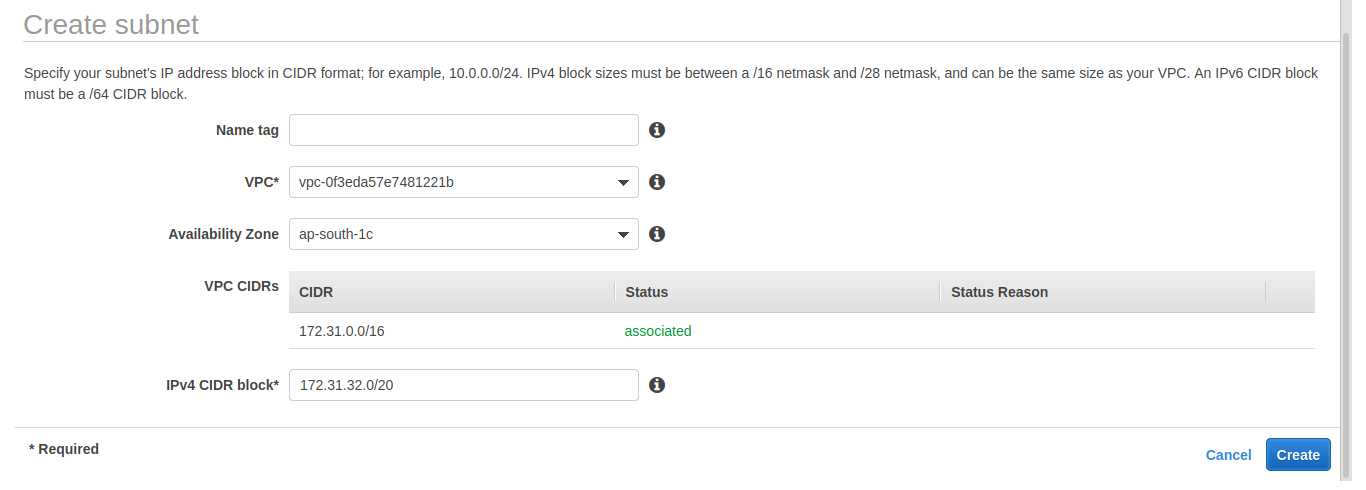
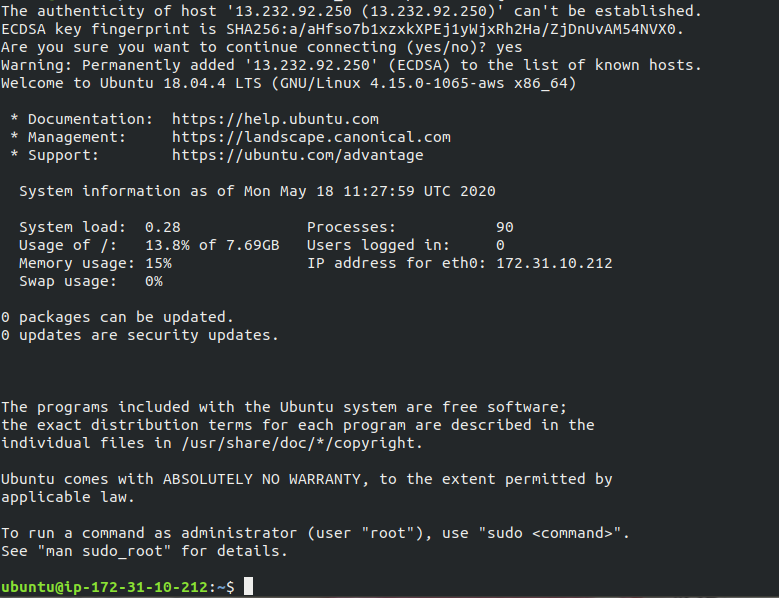
We have successfully created our Default VPC to verify it just launch a new server and try to connect it via SSH if the connection is successful you have created the VPC correctly.

recreate-deleted-default-VPC-AWS

Talk to AWS Certified Consultant

    Spread Love By Sharing:

    Let Us Talk About Your AWS Development Requirements

    Have queries about your AWS project ideas and concepts? Please drop in your project details to discuss with our AWS experts, professionals and consultants.

    • Swift Hiring and Onboarding
    • Experienced and Trained AWS Team
    • Quality Consulting and Programming
    Let’s Connect and Discuss Your Project