May 29, 2020 / Nirav Shah
AWS DataSync is a tool in which you can transfer large amount of data very fast and secure of data online to from AWS. It can handle of transfer hundreds and thousands of terabytes of files at speeds approximately 10 times faster than the open-source tools via AWS Direct Connect Links or via Internet or AWS private links.
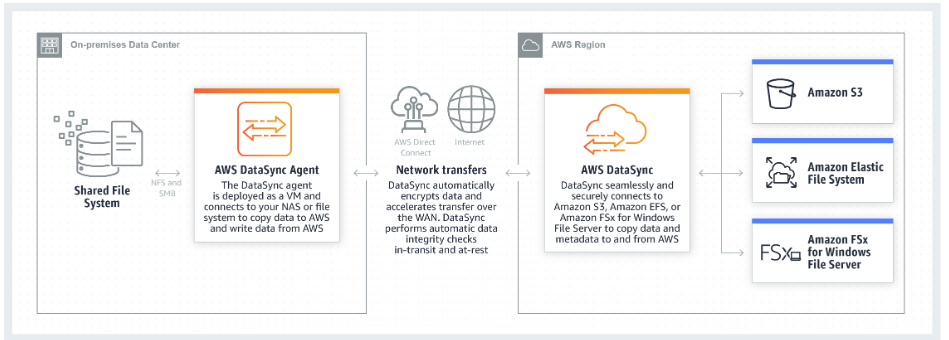
Basic steps to use AWS DataSync,
Note :
AWS DataSync only supports VMware ESXi Hypervisor.
First go to the AWS DataSync homepage,and Click Download image to deploy connector on your on-premise. Choose the region where your connector will be connecting to.
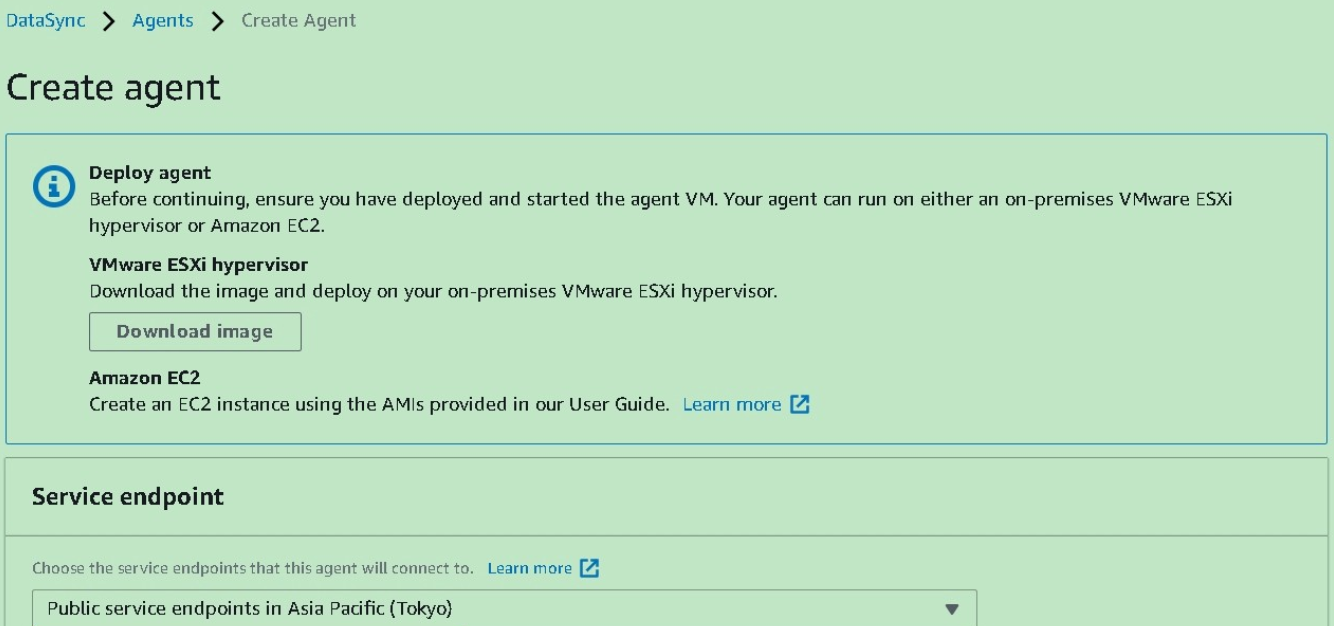
Download the DataSync Agent, unzip the file and import it into your VMware infrastructure. Once the appliance has booted, you’ll be presented with the login screen:
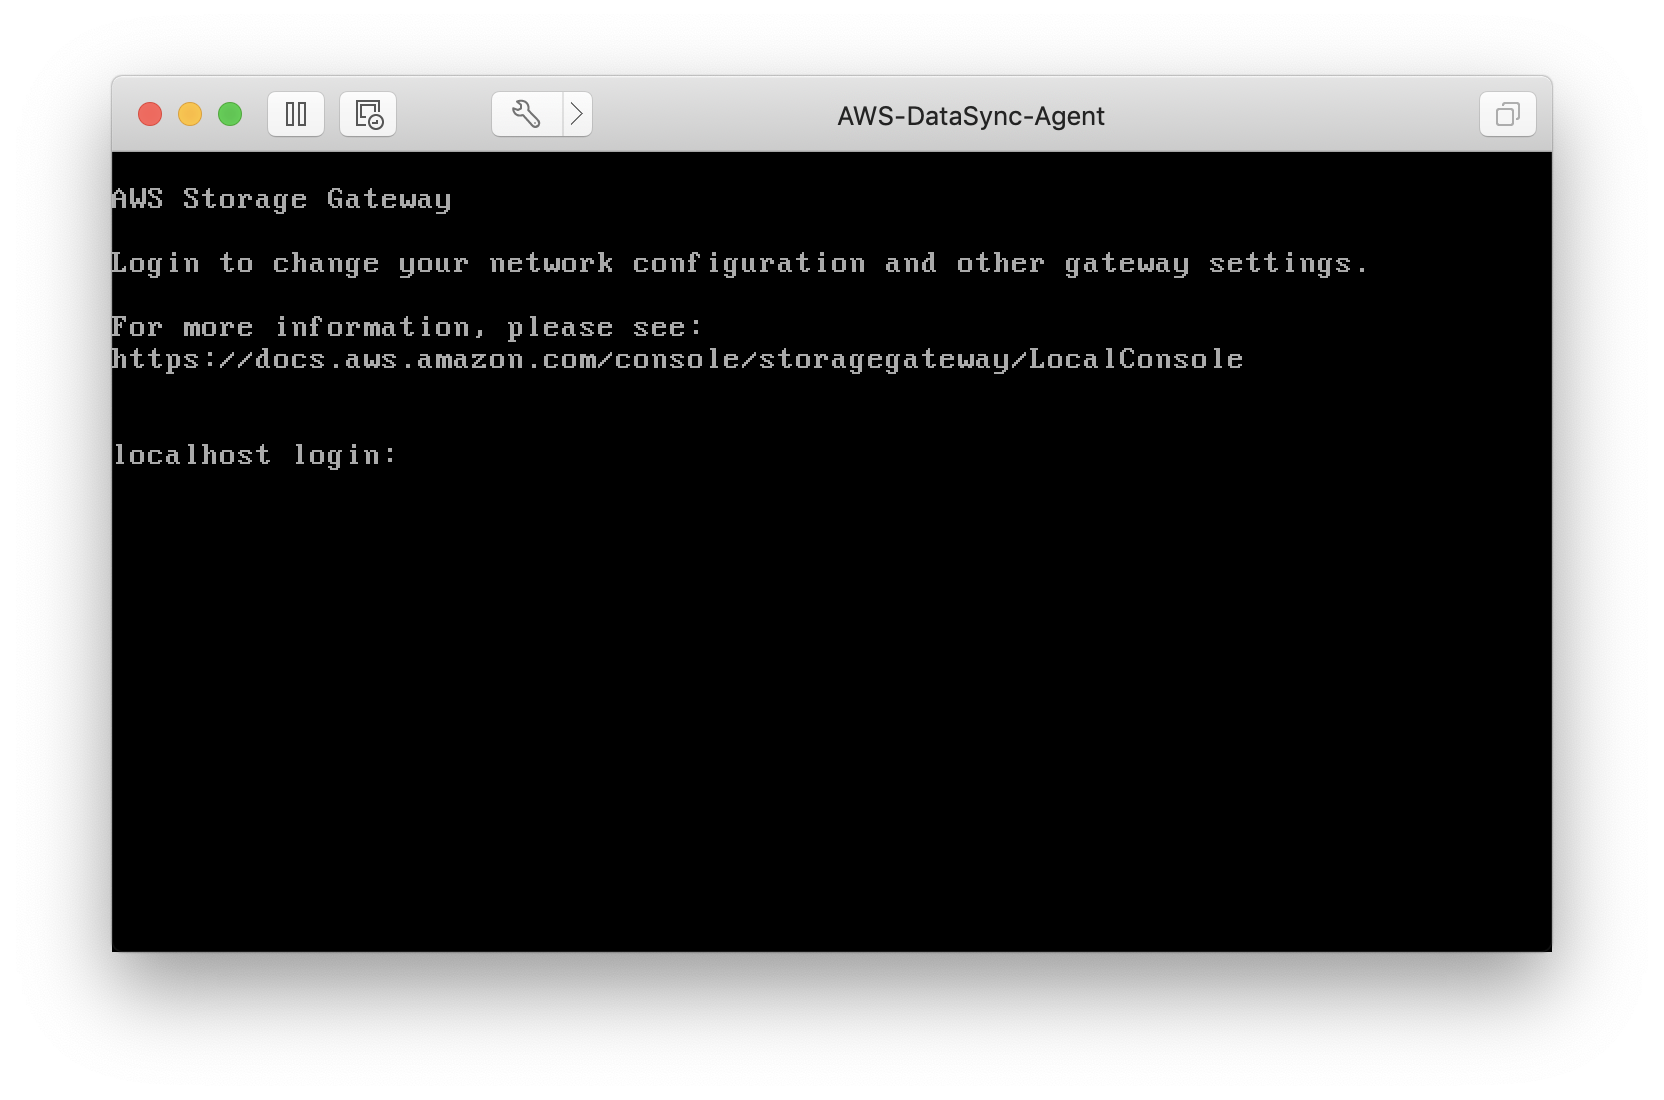
And you can login with the username admin and the password
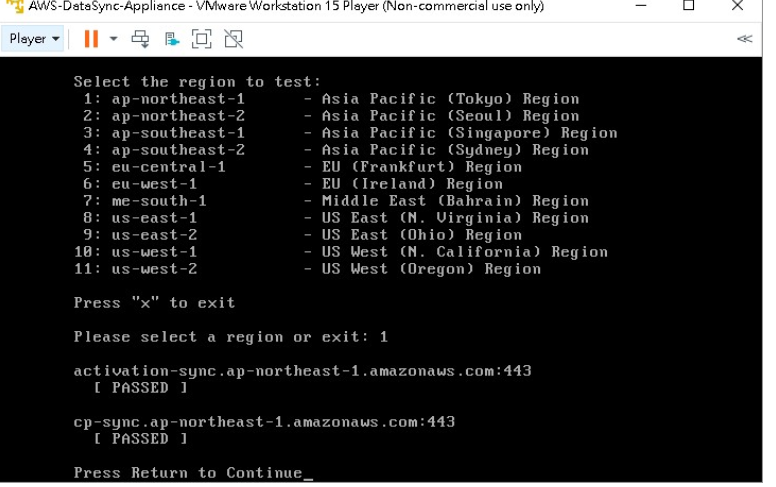
Once done, connect your connector to AWS DataSync by entering your connector’s IP on AWS web console and get a key.
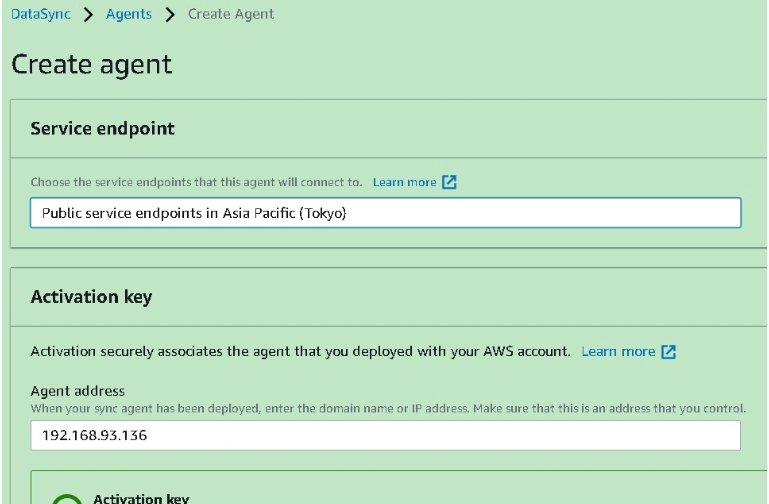
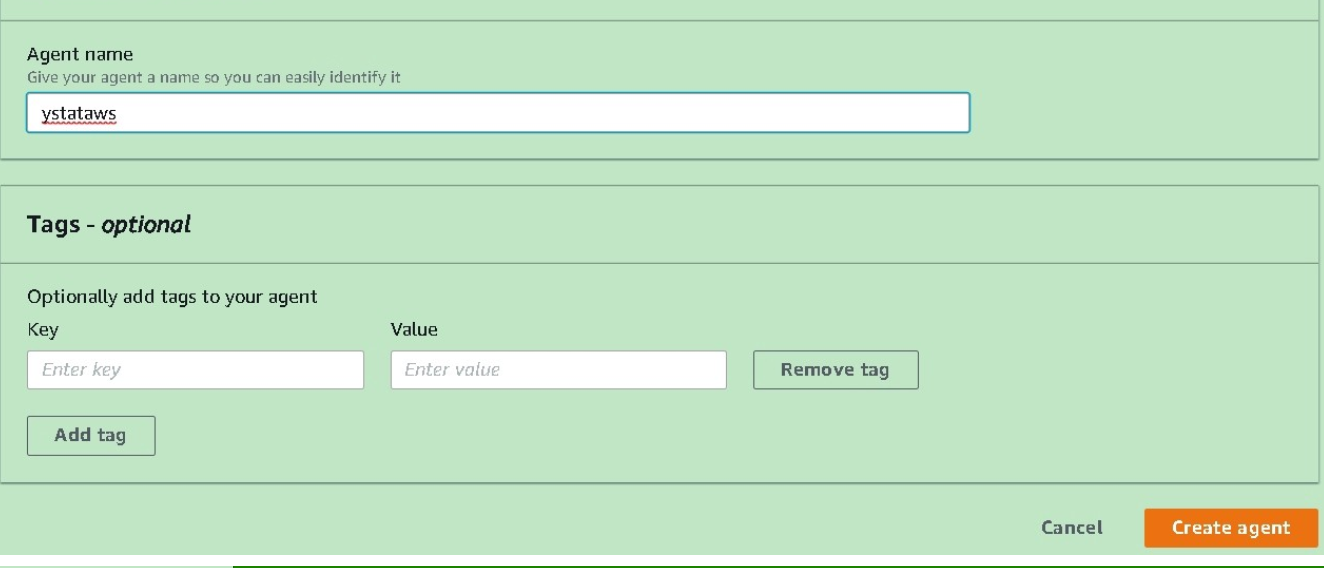
Give your agent a name and it’s done
Now we are Creating our first transfer job
After completing agent you have to create task definition
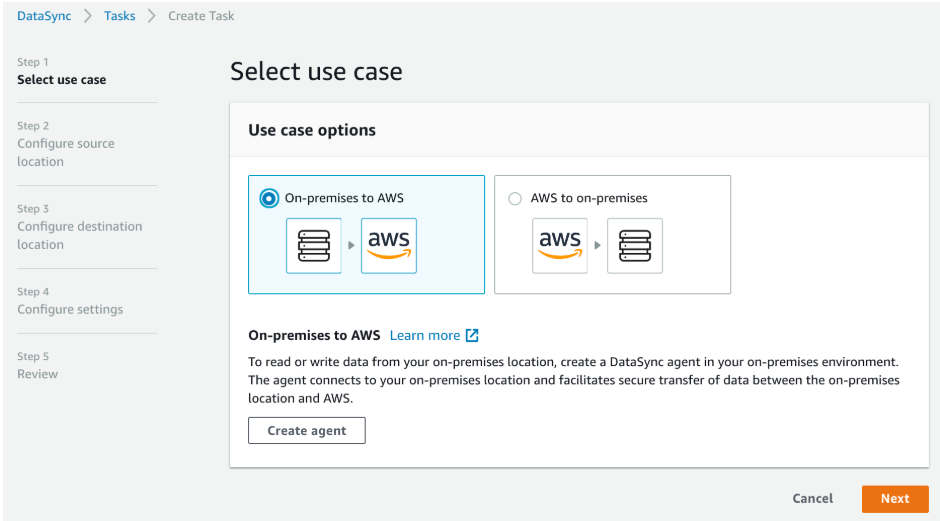
Step 1: for first Specify in which direction we want to transfer our data. We can copy data either from AWS or to AWS, in relation to our on-premise file server. In this example, we’re copying data to AWS (an S3 bucket, to be exact).
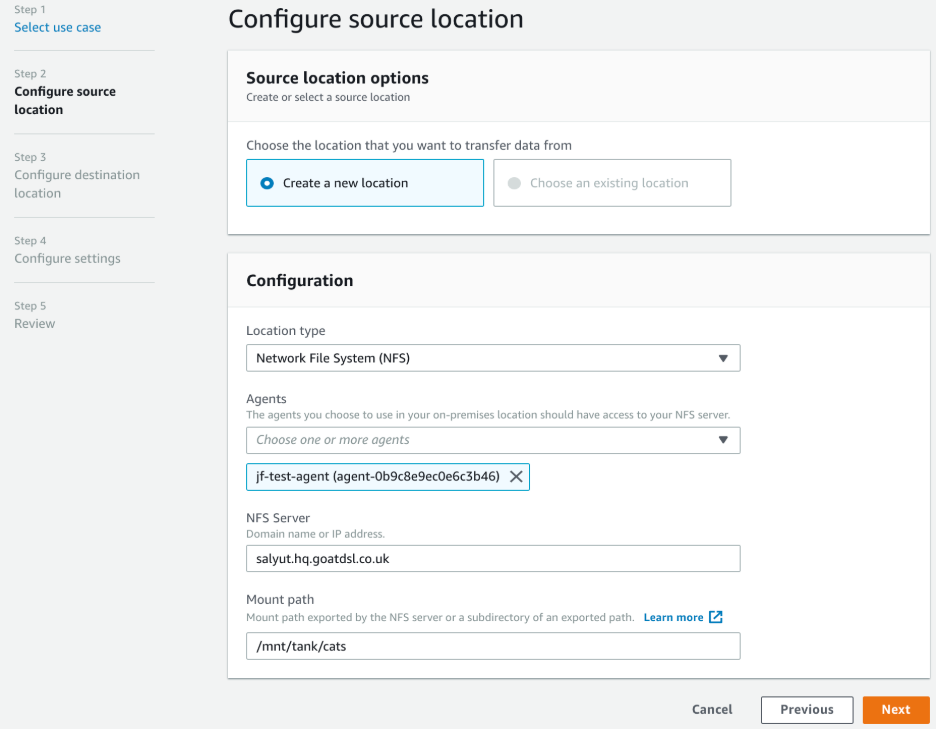
Step 2: We now need to set up our source configuration. The only option for ‘Location Type’ is an NFS server, so we select that. then fill in the details of our NFS server and the path to mount.
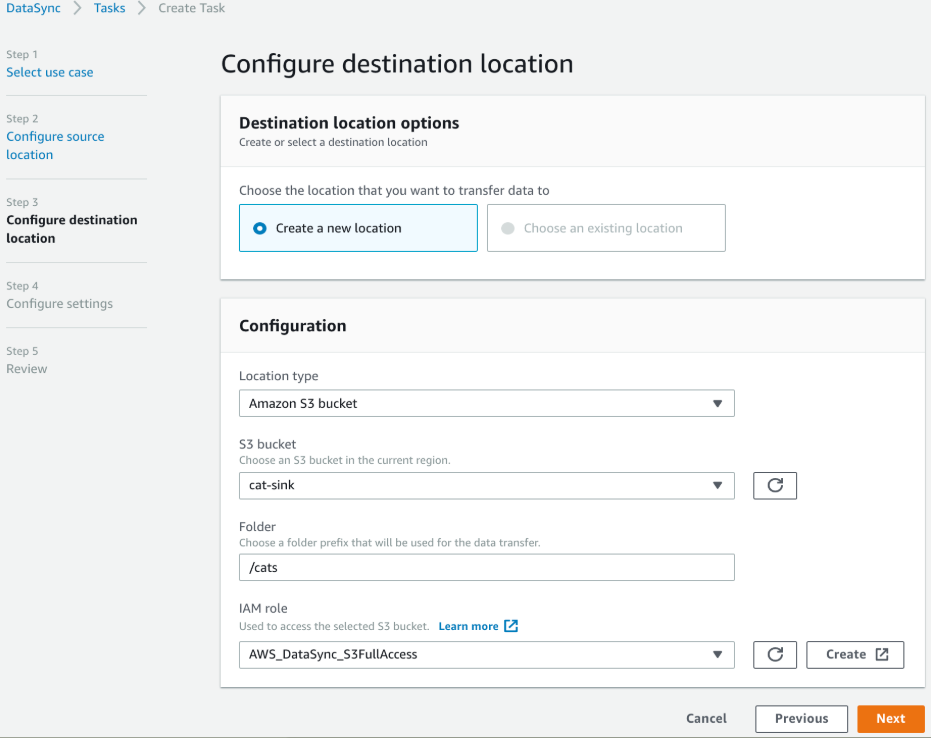
Step 3: create an IAM role and go to the configure settings and Give your task a name (optional) and you’ve got yet another opportunity to attach tags to the task component of the workflow.
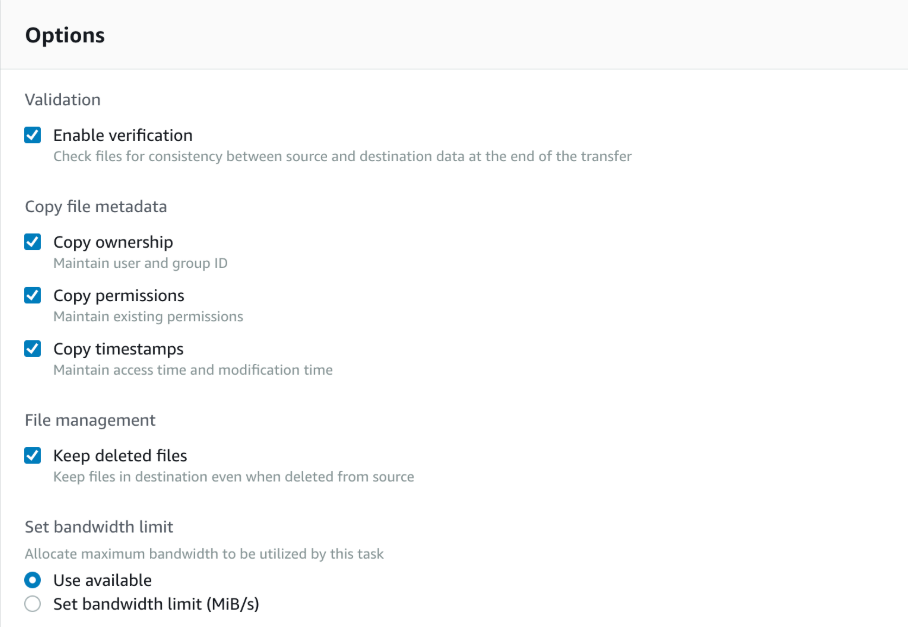
Step 4: You can specify the options for the transfer here. These include the ability to store file ownership and mode information as S3 metadata on the individual objects uploaded, as well as an option to not delete files on the target when they’re removed from the source. You can also opt to validate the transfer was successful by checking the ‘Enable verification’ option – but remember this will slow down the transfer due to the additional overhead of calculating the checksum for each file transferred.
Starting the transfer job is as easy as selecting our new task, clicking the Actions menu and selecting ‘Start’.

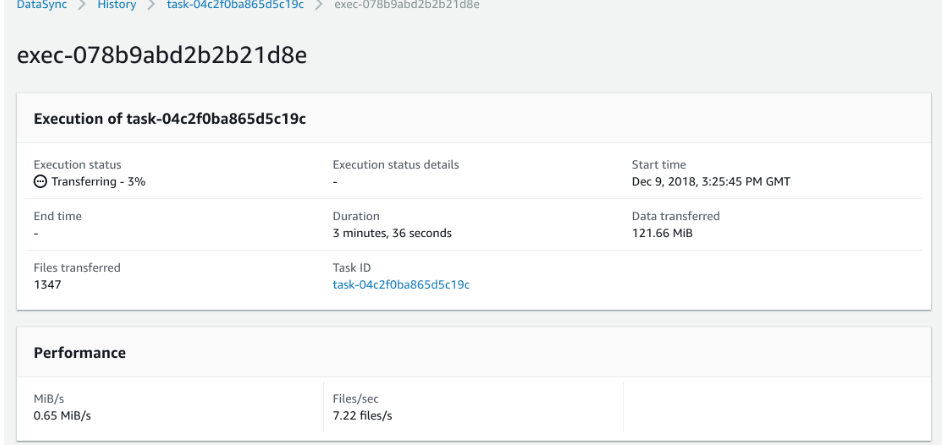
If you click the Execution id you will see all detail things,
AWS DataSync has simple, predictable, usage-based pricing. With DataSync, you pay only for the amount of data that you copy.
AWS DataSync fee for data copied – $0.0125 per gigabyte (GB)
To more details
https://aws.amazon.com/datasync/pricing/
I hope the above has given you a good insight into the new AWS DataSync service
Also Read:
1. AWS Data sync vs AWS Storage Gateway
2. How to transfer your data to AWS?
FAQs:

As a Director of Eternal Web Private Ltd an AWS consulting partner company, Nirav is responsible for its operations. AWS, cloud-computing and digital transformation are some of his favorite topics to talk about. His key focus is to help enterprises adopt technology, to solve their business problem with the right cloud solutions.
Have queries about your project idea or concept? Please drop in your project details to discuss with our AWS Global Cloud Infrastructure service specialists and consultants.