
July 1, 2020 / Nirav Shah
Are you worried about deploying the ReactJS app on S3?????
Don’t worry our AWS expert team will explain to you how to deploy on AWS with a screenshot so it will be easy for you.
Before we started there are some prerequisites that you need to have:
Now sign-in to your AWS account
Step 1 Creating IAM Rules
Now we are creating some IAM rules, this service you can find under the “security, identity and compliance” section.
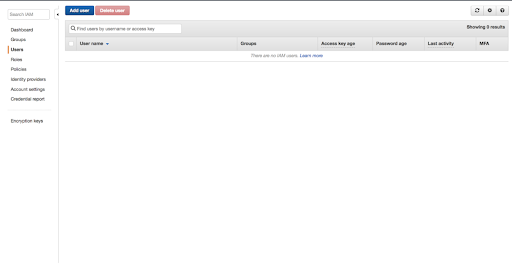
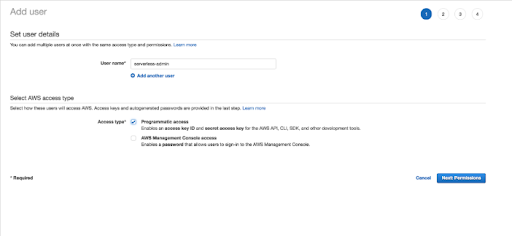
Step 2 Create User Policy
Time to attach the policy to the created user Policy name “AdministratorAccess”
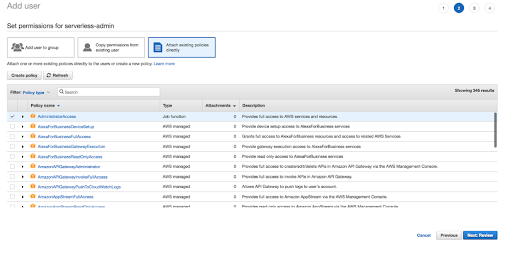
Click on “preview” And Access Key ID and the Secret Access Key for later use. So click Download .csv. Click Close.
Step 3 Install the AWS CLI
Open the terminal window, because it’s time to install the AWS CLI.
$ brew install awscli
Once the AWS CLI has been installed, copy the following command passing in your Access Key ID and your Secret Access Key from the file you downloaded called credentials.csv.
$ aws configure
AWS Access Key ID [None]: AswqAfOSFfDfN7xraMALQ
AWS Secret Access Key [None]: wJaarQUtDFEMIQK7MFENGVbfiWYEHAMPDEKUY
Default region name [None]: us-west-2
Default output format [None]: ENTER
I’m using macOS so that if you are using Linux or Windows the command will change.
Install Node/Npm,
$ brew install node
$ node -v
$ npm -v
We’re going to use the create-react-app to set up our app.
$ yarn create react-app serverless-guru-app
$ cd serverless-guru-app
$ yarn start
Once your react-app is created and open
http://localhost:3000/
Step 4 Create an S3 Bucket

Now we are going to create an S3 bucket.
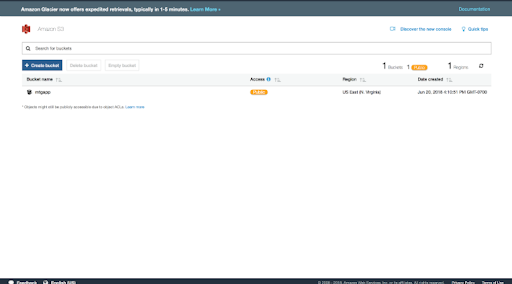
Make sure your bucket is publicly accessible, now click on the bucket and click the Properties tab. And go to Static Website Hosting. Select Use this bucket to host a website option and enter index.html for the Index document. And save it.
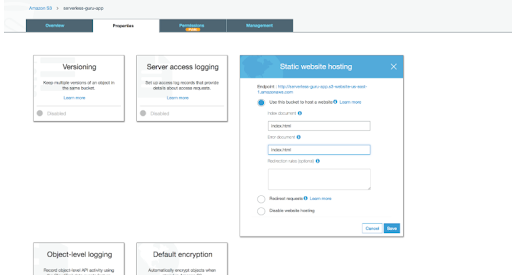
Now click on the Permissions tab and select copy below Bucket Policy.
{
 "Version": "2012-10-17",
 "Statement": [
   {
     "Sid": "AllowPublicReadAccess",
     "Effect": "Allow",
     "Principal": "*",
     "Action": [
       "s3:GetObject"
     ],
     "Resource": [
       "arn:aws:s3:::example-bucket/*"
     ]
   }
 ]
}
Note Write your bucket name instead of “example-bucket” Great work. Everything on the AWS side is ready to go.
Step 5
Now open up our react-app project in a text editor and create a deployment script to make updating our live ReactJS application. And Open your package.json file. Now we add the script and deploy, so we will use the AWS CLI to sync our build directory to our S3 bucket.
#aws s3 sync build/ s3://example-bucket --acl public-read
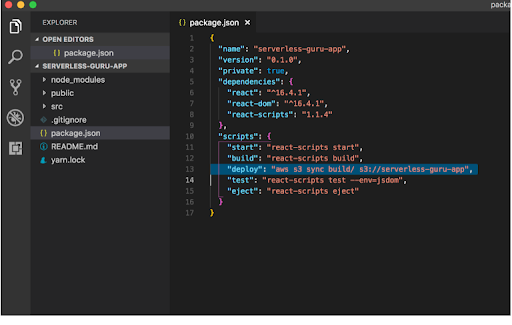
Now open up your S3 bucket in the AWS Console and copy the URL from the Static Web Hosting The URL is like.
example-bucket.s3-website-us-east-1.amazonaws.com.

Congratulations! You created and deployed a ReactJS web application in your AWS account.
Also Read: Deploy Static Website On AWS S3 Using Serverless Framework
FAQs:
1. How do you upload files to S3 using React?
2. Which server is best to host React app?
3. What is a static website in AWS?

Nirav Shah is the Director of Eternal Web Pvt Ltd, an AWS Advanced Consulting Partner and certified Odoo Partner based in the UK. With over a decade of experience in cloud computing, digital transformation, and ERP implementation, Nirav helps enterprises adopt the right technology to solve complex business challenges. He specialises in AWS infrastructure, Odoo ERP, and web development solutions for businesses across the UK and beyond.
Have queries about your project idea or concept? Please drop in your project details to discuss with our AWS Global Cloud Infrastructure service specialists and consultants.